Some gardeners say that growing and caring for Radiance Abelia shrubs is a really easy process and there are other gardeners, who complain of not being able to handle it. Actually, if you can plant it in a suitable position and follow all the required steps to care for the plant, it will remain in full bloom and grace your garden with beauty.
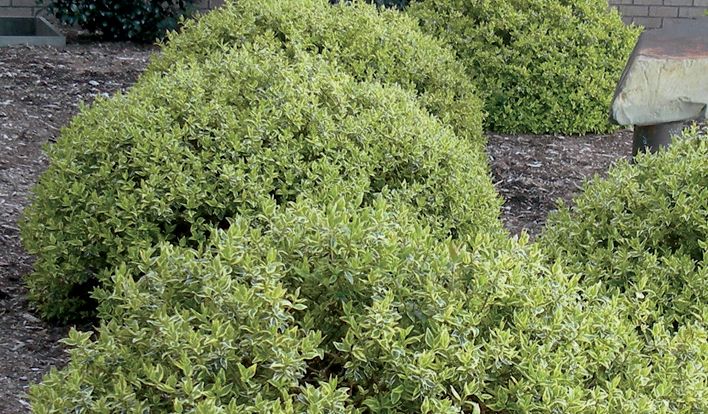
Radiance Abelia shrubs are unique plants that maintain their color throughout the year and are known for their naturally compact mounding habit. They are of middle to low in height and have moderate to more than moderate heat tolerance. The plant yields flowers between the Spring to Fall seasons.
A detailed guide on how to care for Abelia Shrubs in your garden
First, let us learn about the soil and light preferences that are most suitable for the plant to grow.
Soil drainage
As is the case with many other decorative plants, Abelias don’t fare well on very soggy soil without drainage. Other than that there are no such other soil specifications required by these plants to grow well.
To make sure that the soil is well-drained, you need to perform a simple test. Start by digging a medium-sized hole on the soil area in which you intend to plant the Radiance Abelias. Then fill up the hole with water and let it drain out. Your actual soil-testing will start when you fill the hole with water for a second time. A standard acceptable rate of drainage will be one inch every hour but that of course depends on the size of the hole. If it drains out too fast then the soil is loose and sandy, a moderate speed would imply a well-balanced drainage amount in the soil and if it drains too slowly then you have to arrange for better drainage because wet earth may cause plant-diseases to the Abelias’ roots.
Soil pH
Radiance Abelias grow best in slightly alkaline soil with a pH range of 5 to 7. This pH range can be found in most gardens.
Like soil drainage, you also have to conduct a little experiment to test the alkalinity or acidity of the soil. Visit any nearby shop that deals in gardening and look for a pH soil tester probe. You have to stick into the soil area where you will be planting the abelias. The pH test is done on a measurement scale of 1-14 with 7 as the natural unit. Anything below 7 is considered acidic and anything above 7 is alkaline. You can adjust the pH amount of the soil too. To make it more alkaline you can add limestone in the form of pellets to the soil. To lower the pH that is to make it acidic or at least make the soil less alkaline you can add soil sulfate or aluminum sulfur to the soil.
Light preferences
Radiance Abelias are most ‘radiant’ when they are exposed to direct sunlight. A minimum of 6 to 6.5 hours of direct sunlight will assure that the foliage and the color of the foliage are well. A part shade is also a nearly ideal light condition for this plant.
Steps to grow Radiance Abelias in your garden
Not that you have been familiarised with the suitable conditions for the plant, it is time to know the exact steps in which this shrub is planted in the soil.
- You will start by digging a hole. Dig it at least two or three times as wide and deep as the root ball height of your abelia shrub. A wide and deep hole will be ideal. Place the soil that you dug in a round way making a perimeter around the hole.
- After you have conducted the soil drainage test, you have to now amend the soil type. If the soil is too soggy then you can add bagged up topsoil, sand, or an organic mix to make it less wet. If the soil is extremely dry then you can add compost, peat/moss, to preserve the moisture in the soil. An optimum moisture amount is needed.
- Abelia root balls can be a tangle of a mess so while you place the plant from the container it was in until now to the hole you just dug, it is best that you remove the container away by cutting it to not damage the root. After the root is free of the container, gently cut away some feedee roots from the main root to essentially lessen the mess.
- Slowly lower the plant into the hole and in such a manner that the upper edge of the root ball is at or a little higher than the ground level to allow for settling.
- Start back-filling the hole with one hand and hold the plant straight with another hand. Once you have half back-filling the hole you can soak the soil a bit and continue the process till you reach the upper edge of the root ball; do not suffocate the root ball.
- Now water the area well and deeply.
To retain moisture and avoid weed growth around the plant soil, you can apply a layer of chipped or shredded wood to the soil. Don’t use freshly chipped woods though, let it cure in a pile for at least 6 months before you use it as mulch.